Workers at Chrysler’s Clairpointe Pre-Production facility completed the first Plymouth Superbird on this day in 1969, initiating a historic run of iconic NASCAR inspired muscle cars. Superbirds, which began life as 1970 Plymouth Road Runners, underwent most of their assembly at Lynch Road, about five miles away. Final assembly, including installing the nose cone and wing, occurred at Clairpointe so as not to disrupt an entire production line for a small run of parts. The build process of the Superbird is quite fascinating, as told below by Mopar historian and author David J. Patik, who sadly passed away in 2020. Thanks to David, we are able to imagine traveling down the Superbird production line…
The following article contains rare history of the Plymouth Superbird:
LYNCH ROAD ASSEMBLY LINE OPERATING DESIGN
By David J. Patik (Images and subheadings added for context)
Few Mopar enthusiasts have ever seen an automotive assembly line. Fewer still saw the assembly of Mopar muscle cars. Almost no enthusiasts active today in the hobby worked at Chrysler those many years ago.
Imagine the wealth of memories a Chrysler Engineer of that time period could share with us today! Gil Cunningham from late 1969 to 1974 was a Product Engineer at Chrysler’s Lynch Road Assembly Plant, specializing in Body Sealing and Paint. This job entailed keeping his area of the assembly process running smoothly, and production testing of proposed changes in materials and/or their method of application and installation. Before and after Lynch Road service, Gil held several engineering positions at other Chrysler facilities, in both the car and truck divisions.
Today Engineer Gil is Dr. Gilbert Cunningham, chiropractor in private practice in Tallahassee, Florida. After a total of nineteen years at Chrysler, Gil eventually fulfilled his desire “to do something completely different than engineering, and work for himself.” He is very much an enthusiast of Chrysler special cars, being Vice President of the Chrysler 300 Club International, and is the owner of a rare 1962 300H convertible, as well as other Letter Series Chryslers.
The article that follows is based on several interviews with Dr. Cunningham. It also contains information from interviews with former Chrysler Production Scheduling Programmer Walter Redmond, and long-time Chrysler Facilities Engineer Bob Badyna. In addition, Chrysler special body program information was derived from a presentation by NASCAR Program Design Engineers Larry Rathgeb, Gary Romberg, and John Pointer at the Winged Warrior National Meet in 1977.
Let’s make a tour of Lynch Road in December of 1969, and follow the building of a SuperBird. But first, this imagination exercise: to get a good idea of the size of this facility, think of your local K-Mart store. It’s about the size of a one-stall garage compared to the Lynch Road Plant! Built in the late 1930s, Lynch Road began building Plymouths after WWII. During the Muscle Car era, it employed 5,000-6,000 people. Only one story in design for the most part, ranging from eleven to fourteen feet tall, Lynch Road measures 660′ wide by 2500′ long. In 1969, it is considered quite modern and efficient, although the low ceiling height causes considerable difficulty in moving equipment into place.
Cars actually begin their life in the Production Scheduling Department. There, computer programmers perform tasks that are listed here in simplified form:
- Highland Park (main office) decides which plant will build the car, based on distance from dealer, workload, and parts availability.
- If the car has been ordered by a customer through a dealer (Sold Car), insure that the sales personnel have ordered options and equipment possible for that model of car. The Vehicle Order Number that will appear on the car’s fender tag and broadcast sheet is preprinted on the dealer’s order form (except Special Order Cars).
- If the car is a dealer supply (Sales Bank) car, insure that this order information is correct.
- If a Special Order Car (S.O.C.) is to be built, (SuperBirds are S.O.C.) program in code “Y39” special building instructions on the broadcast sheet.
- Schedule the car’s build date. Nightly meetings of Production Control personnel determine which cars will be built three days in advance, based on the in-stock supply of necessary parts.
- Assign a Production Sequence Number, used for tracking the car through the assembly process, and coordinating parts and sub-assemblies for the car.
- Assign a Vehicle Identification Number (V.I.N.) to the car.
The scheduling of production requires some explanation of a basic goal of an automotive assembly line. That is, cars were scheduled for assembly in the ultimate mixed up order. Models were mixed (Belvederes and Coronets), bodies were mixed (station wagons, sedans, etc.), engines-transmissions-options were mixed. Why?
There were two reasons for this mixing. Bearing in mind that the line never stopped moving (except for disasters!), almost one car per minute left the final assembly line as a finished machine. Therefore, there were very real limits on the available manpower and space to physically get the exact needed parts where needed, as needed. The second reason for mixing models and options was the actual assembly time required. Some options were very common, some rare. A person on the line may have been responsible for installing more than one item on each car. Several people were needed to install some items.
So, the last thing that Lynch Road assembly supervisors and workers wanted was a relatively small order of very special cars. Imagine the massive increase in the order shuffling system that was required to integrate a SuperBird sub-model that required many special parts! This was to be a run of about two-thousand cars, scheduled for late 1969, with a required completion date of January 1, 1970 (to meet the NASCAR homologation deadline).
Planning the Superbird Assembly at Lynch Road
Chrysler management decided to have Lynch Road build running, completed SuperBirds, minus the wing and the nose cone assemblies. The cars would then be transported to the nearby Clairpointe Pre-Production facility for completion. Most special SuperBird parts were to be supplied by the custom-specialty firm Creative Industries, which either made these parts or purchased them from outside vendors.
Well, now that we understand the basics of SuperBird production planning, let’s get to work building one!
The Lynch Road Plant consists of six major areas of assembly, each of which functions as a nearly-independent mini-factory.
- Metal Shop = Body-in-White (BIW): assembly of complete bare body.
- Paint Shop: metal preparation, painting.
- Chassis Department: Engine “dress,” mating of engine-transmission-rear end assemblies.
- Trim Line: Installation of body mechanical and electrical parts and sub-assemblies.
- Final Line: Glass, interior, final details.
- Car conditioning: Repair of completed vehicles, misc. tasks.
It will take two day’s construction from Metal Shop to loading a running car on a transport truck! The very long assembly lines move slowly and steadily.
We will begin our tour in the Metal Shop, where a few codes on a fender tag and a broadcast sheet guide the production of a complete, bare metal body. These two all important “blueprints” for each car result from the work of the Production Scheduling Department.
Lynch Road in the 1970 model year builds (“frames”) sixteen different body types:
R = Belvedere W = Coronet
Coupe
21 Hardtop
23 4-Door
Sedan 41 Wagons
45/46 Coupe
21 Hardtop
23 4-Door
Sedan 41 Wagons
45/46
Non A/C X X X X X X X X
With A/C X X X X X X X X
Assembly of the body shell begins by laying the sub-assembled passenger compartment floor and forward frame rails and the sub-assembled trunk floor and frame rails onto a moving floor-level “truck” fixture. To either side of this floor pan fixture are secured (a short distance later) massive, hanging, moving fixtures called “sidegates.” They locate to the floor pan assemblies the body side components: lower sills, cowl sides, “A” pillars, roof rails, and quarter panels.

Body parts are manually welded. Several hundred huge, pincher-type spot welders and their many cooling lines hang from the ceiling in the Metal Shop, giving it the appearance of an industrial rain forest. The high heat of the welders is dissipated by piped-in water to each unit, and their bulk is made more maneuverable by using their transformers as counterbalances.
In essence, every part of the body that will be color-coated is permanently attached in Body-in-White. Mating surfaces are coated with a grey, zinc-rich weld-through primer prior to spot weld assembly (in corrosion-prone areas). To prevent rust-out of bolted-on mated areas like door hinges-to-cowl, and fenders-to-inner fenders, a dark green zinc chromate primer is manually brushed onto each of these mating surfaces before body assembly.
Whether a car has air-conditioning is vital to Metal Shop because the dash panel (firewall) is a much different stamping for air conditioned cars than non-air cars. What about other options that require special body holes and studs? Nearly every body hole required for these options is dimpled into the metal stamping. The Metal Shop line is very long, with ample time to use its many hole-drilling fixtures and weld-stud fixtures. This avoids the plant complexity of too many different stampings, (regarding ordering and storage), and it’s cost effective.
If a run of special bodies is planned, as with the SuperBirds, Metal Shop builds up from the stamping plant a “bank” of the special parts before assembly of the cars begins. These special runs of cars are never sent en-masse down the assembly line, but are sent in small clumps. (SuperBird records on file today reflect exactly this procedure).
Hemi-powered cars merit special mention. Their rear frame reinforcement plates are welded on to the frame rails at the stamping plant, creating a special trunk floor sub-assembly to be stored and then used at Lynch Road. Approximately one Hemi-car per shift is assembled (two shifts per day; the third shift is for plant maintenance).
Before exiting the metal shop fabrication area, every body receives its very own premade fender tag. It is attached to the left inner fender by its forward screw only, then pulled up at its rear. This allows inspector’s punches to be impressed on it later, and allows the primers and color coats to be applied under it. (This is not a universal practice on every car or at all plants; sometimes the tag is hung inside the car by a paper clip).
Another vital task of the Metal Shop is embossing “secret” portions of the VIN on at least two pieces of welded-on sheet metal of the car. This is accomplished with an air or hydraulic embossing tool containing numbers and letters, manually located and actuated by its operator.
Since we are building a Superbird, the work of the Metal Shop is still not finished. Every special part to be welded on and/or color-coated must be installed in this area. Most of this work will be done in “repair holes,” which are side-tracks off the main assembly line. The major parts to be welded in are the rear window plug, wing support plates under the quarter panels, trunk floor brace brackets, and the hood latch tray mounting bracket.
The major bolted-on parts are the modified 1970 Coronet hood and fenders. The front section replacement work on the hood is done at the Chrysler stamping plant, while the more minor fender modifications are done at Lynch Road in the Metal Shop. Many special holes are drilled in the body for the wing, the 1968-69 Charger vacuum headlight system, and the fender scoops. Some usual Road Runner holes are not drilled, such as those for the metal nameplates on the quarter panels.
When the special-body modifications are completed on the SuperBird, it rejoins all other completed bodies in a holding area at the end of Body-In-White. From here, cars are selected at random for insertion on the Paint Shop line. The Sequence Number of each car is sent ahead via computer to the Paint Shop.
Factory Painting a Plymouth Superbird
Every car begins its trip through Paint Shop with a trip through a seven-part, full-body spray and partial immersion in a series of chemical applications.
- Hot chemical cleaner to remove waxy die-drawing compound, dirt, joint-leading residue.
- Hot rinse.
- Another hot rinse.
- Paint anchoring, metal etching and coating phosphate solution.
- Cold rinse.
- Conditioning solution.
- Dip up to headlamp level in grey water-based primer. Before this has dried, outer body is hosed off to prevent paint ridges caused by this primer, which would show through the color coat.
The first six of these steps are the “Bondurite” cleaning and coating process. The final dip in primer is a Chrysler-invented step in corrosion protection, begun with the 1960 model year. Through all of these operations, the body is supported by large hooks, the forward of which pass through the windshield opening and attach to the dash panel area. The rear hooks attach in the wheel tub area. The hood and deck lid remain open to avoid large amounts of the chemicals becoming trapped in them. The many stamped-out large holes in the floor pans allow the chemicals to drain out. Passage through a dry-off oven dries the Chrysler Chemical Corp.-manufactured dip primer, and evaporates any water wash residue.

Now the SuperBird body requires another special step, the application of heat-curing “Plastisol” one-part filler around the rear window plug. Since the car will have a vinyl roof (purposely), only shaping and rough sanding of the joint area is necessary. This avoids the time-consuming (and toxic) joint-leading process that is performed at the roof-quarter joints on all cars without a vinyl roof.
Body sealers are now applied to all cars. A black, tar-like sealer is applied to all passenger compartment floor joints. This same always-soft material was used in the trunk compartment area until the wife of Chrysler President Lynn Townsend found that her luggage once was marred by it. That episode resulted in a corporate switch to the much more expensive, hard-drying Plastisol white sealer in the trunk! This sealer is also used in the joints around the rear window panel, and similar outer-body joints. Sound deadener is sprayed on the inside of the quarter panels as accessible from inside the trunk compartment, and to the inside of the door skins.
Now it is time to prime the body. All cars, regardless of body color, use a dark grey primer. Workers in the prime booth spray the door openings, and under/inside the hood/deck areas. Dummy, recycled 1/4″ wire latches keep the doors, hood, and deck lid shut. Robot guns on curved tracks spray the sides, roof, hood, and deck lid outer body, their spraying actions programmed according to the car’s body style. The insides of the car, and the underside receive only overspray.
Booth overspray is collected by water that flows downward all along the sides of the spray booth and over to its center, where it catches the paint particles in the downdraft through the open steel gridwork floor.
The “Upper Door Frame” (UDF) color is sprayed on any inside metal of the body shell that will not be covered by upholstery or metal finish panels. This colored paint is sprayed on before the primer overspray has dried.
Cars remain in the primer baking oven for approximately twenty-five minutes at 350-375 degrees. This high heat is intended also to cure the weld primers and vinyl plastisol sealers, which were applied with a gun to panel joints prior to being welded together.
The primer is wet-sanded at Lynch Road, using power disc hand-sanders, which have built-in water sprayers. Only the outside of the body is sanded. Following a wipe-off of primer residue, the body is cleaned with naphtha, then wiped with an alcohol-and-water solution. The UDF color is masked off by hand, with tape and masking paper.
Since our sample SuperBird is basically a 1970 Road Runner, its tail lamp bezels have been attached to the tail light panel with their purposely-long studs, while being spaced from the panel with one-inch sleeves. This allows the bezels to be painted with the car body, and allows painting of the tail-light panel contact areas, preventing rust. After the paint is baked, the sleeves are removed, and the bezels are permanently attached.
It is essential to note that a primary goal of assembly line painting of all cars is to have every part of the car that will be color-coated be permanently attached to the body before it enters the paint booth. This prevents the inevitable paint scratching of subsequent painted-parts assembly. Also, parts that are not to be color-coated are not installed on the car prior to entering the paint booth, thus avoiding masking off.
The front valance panels present a problem unique to SuperBirds. (They are the body panels that attach to the fenders forward of the wheels, and are later bolted to the nose cone supports [bumper brackets]). The valance panels can not be attached to the fender during painting because they would hang down at their underbelly end and get caught all along the assembly line. Yet, the valances are in an area of high rust potential, and must be color-coated.
The solution was to make them of galvanized steel, eliminating the need to run them through the Bondurite system. For color-coating, the valances are hung with short wires from the roof rails inside the passenger compartment, and painted there by the workers while the car was in the color paint booth. (This was a later standard practice on cars with bolted-on front or rear valance panels).
The SuperBirds’ rear window lower “corner” pot metal trim pieces are another painting problem, because they cannot be attached to the body during color-coating. Painting of the underlying sheet metal is necessary to avoid rust, and the trim pieces are painted body color and flat back. So, they are supplied to Lynch Road already color-coated for each allowed SuperBird color.
The baking oven for the color coat has a temperature of about 250 degrees, and baking time is twenty to thirty minutes. If a car comes out of the oven with paint problems, (usually dirt, sags, or drips) it goes to a Paint Shop repair hole. There the finish in the problem area is correctly prepared, the surrounding area is masked off, color-coating is applied, and the car is sent to the repair area’s oven.
Those rare cars (fleet cars, usually) that are to be two-toned (painted metal roof different than body color), are removed from the exit line of the baking oven. They are placed on the entrance line to the paint booth, where the lower body is masked off. In the paint booth the roof color is sprayed, then the car passes through a baking oven again.
No color coat is applied to the roof of cars that will receive a vinyl roof, greatly cutting the use of expensive finish paint. Vinyl roofs are installed in the Paint Shop after a car’s exit from the baking oven. This includes our sample SuperBird, which passes through the adhesive spray booth, then gets its mandatory black vinyl roof, specially-cut to fit the semi-fastback rear window plug. They may also apply decorative stripes to other models, particularly if the stripes are installed before body fittings that cover portions of the stripes. Station wagon woodgrain decals are applied by Paint Shop workers.
Rare Superbird Colors
Now is a good time to illustrate one of the assembly line problems caused by the special-ordered SuperBirds. Our tour guide through time, Engineer Gil, distinctly remembers one SuperBird that was painted a color not allowed for SuperBirds.
Every dealer announcement for the SuperBird, and every factory engineering document for the car states that it would be available in only seven colors:
- Blue Fire Metallic EB5
- Alpine White EW1
- Vitamin “C” Orange EK2
- Lemon Twist FY1
- Lime Light FJ5
- Tor-Red EV2
- Corporate Blue 999 (Ditzler DRA 12785)
This problem car got painted FK5; that’s Burnt Orange Metallic. The car went as normal through the baking oven, had it’s vinyl roof installed, and had quite a few of its mechanical parts installed. Someone caught the paint error on the line in the Trim Shop. The painters had read the fender tag incorrectly, or the Production Scheduling people coded its color incorrectly, or an “illegally-ordered” color slipped through from a dealer’s order.
By now the car was much too far assembled to pull it off the Trim Line, re-insert if on the Paint Line, scuff sand its new paint, reshoot it a correct color, and run it through the high heat of the baking oven. And, the car was already built in the Metal Shop as a SuperBird, so it could not easily be converted to a regular Road Runner, which did allow Burnt Orange Metallic paint. It was finally decided by Product Planning to finish building the car as a SuperBird, and send the car to Clairpointe as usual, along with a can of orange paint, and a note explaining the problem! (If the broadcast sheet and fender tag paint codes did not match the FK5 color, this car received re-issued identification). Researchers have so far found three SuperBirds painted the “impossible” FK5!
Back to the normal assembly line now! The work of the Paint Shop is now completed; the painted shells gather in the painted body bank before they are loaded in a mixed-up order of paint and body style onto the track for the next assembly line area at Lynch Road, the Trim Shop.
Superbird Trim Assembly
Here a wide variety of parts for the car will be installed except the interior, glass, window chrome, and final details. The Trim Line installs weather seals, all electrical wiring and its equipment, headlights, and the complete instrument panel. Here the engine-transmission-rear end will meet the body, the tires and wheels will be installed; a running car will be produced.
How is it possible for the thousands of parts for each car passing through Trim Line to be quickly selected for assembly to the correct car? A central feature of assembly line operation is having the exact needed part awaiting the exact intended car. Some parts are small, and are used on every car. They are dispensed from bins and buckets within easy reach. Large parts, such as engine and transmission are trucked in from their manufacturing and sub-assembly plants, and placed in plant storage areas.
A basic description of the role of broadcast sheets, also called “track sheets,” in the assembly plant would now be helpful. Cars are sent from one stage (or department) of assembly to another department without any regard for keeping them in the numerical order of their Vehicle Identification Numbers. Yet, the sub-assembly personnel, as well as the car assembly workers, know in what order the cars will be arriving on the line well before the car actually gets there. That is because the broadcast sheets in their area are printed in the order in which the cars will actually arrive using the Sequence Number of each car for their department re-sequencing; i.e., each “new” department has its own Sequence Number.

There is a broadcast sheet Addressograph Multigraph teletype at the start of all major departments. A highlighted broadcast sheet four times the normal size is taped to the front of the hood, which provides ready reference for assembly workers.
To understand how a major part moves from its sub-assembly plant to installation in a car, let’s suppose the SuperBird we are building is to be Hemi-powered. We will follow the path of its engine.
The Marysville Engine Plant is located about fifty miles from the Lynch Road Assembly Plant. All Chrysler street Hemi-engines are assembled there. As is standard practice with most Chrysler engines, Hemis are assembled as complete basic engines, including exhaust manifolds, heat tubes, and even the negative battery cable. The coded assembly markings are stamped into the block’s forward identification pad before the entire assembly is painted Hemi orange. The black valve covers are installed, then the spark plug tubes, plugs, wires, and the distributor. Oil and water are added to the engine, and a source of propane and air is fed into the intake manifold. The engine is test run and checked for leaks.
No Vehicle Identification Number is stamped onto the block’s right lower pad because at this point the engine is generic; it could be installed in any body. For the same reason, the carburetors and the oil pressure sender unit are not installed-different cars use different parts. However, the engines are designated for manual or automatic transmission, depending on whether the pilot bushing is installed in the crankshaft.
Like all engines, Hemis are inserted into heavy steel racking that holds six engines to a rack. These are loaded with a forklift onto a Dodge-powered Corporate Transportation semi-trailer. Once transported to Lynch Road, the racks of engines are moved to a production line storage area. Forklifts stack these racks four to five levels high, creating a formidable-looking skyscraper of Hemis! When the Engine Dress staging area runs low on its immediate supply of Hemis, a forklift brings one rack-full. Much more frequent deliveries are required for 318 and 383 engines! The Engine Dress area is part of the Chassis Department, which is fed into the moving Trim Line. The idea is to have the completed assembly of K-member (with mounted steering, brakes, suspension, and engine) plus transmission-drive shaft-axle meet the waiting body.
Let’s backtrack a bit, and look at the process of parts selection for the Engine Dress and Chassis Line areas. Here are the teletype printers that issue broadcast sheets well before the car arrives to meet the Chassis Line; in fact, these broadcasts are printed as soon as the car is loaded onto the Trim Line from the Paint Shop. Parts are always stocked on line on basis of production schedule – i.e., what mix of cars are being built. Parts are not “gathered” on receipt of a particular track sheet (hopefully anyway!).
This parts selection is simplified to reduce time and errors by marking the parts and sub-assemblies with partial part numbers, identification stickers, tags, and paint-dabbed color codes on the parts. The partial part numbers that appear in the upper portion of the broadcast sheet guide this entire selection process for each car. Workers in all plant areas also refer to large, hanging instructional posters, called “graphic illustrations” for correct car construction.
As soon as a generic Hemi engine is selected from the supply rack, the partial VIN of its intended car body is stamped by hand onto the right side pad cast there for this purpose. An inverted “Y”-shaped hook attached to a one-ton air-powered hoist grabs an engine by its exhaust manifolds. This transfers it to an oval track (called the merry-go-round), from which hang large “hooks” on which the engines are loaded.
A generic Hemi automatic or manual transmission is selected, and mated to the engine. It becomes specifically built for our SuperBird with the additions of stamping the car’s VIN, and installing the shift linkage and speedometer pinion. The engine now receives every part to complete it except the air cleaner: carburetors, fuel lines, pulleys, power steering pump, fan, oil filter, and throttle linkage. A steel shroud is placed over the right Hemi valve cover to prevent it being scratched and dented during the tight clearances of installation.
Adjacent is the moving Chassis Line, which has been busy installing its correct parts for our SuperBird. Beginning with attaching the special Hemi K-member to a line fixture, the items installed on it include the steering box and all linkage, the complete front suspension, and brakes.
A few feet farther back on the line, the correct axle housing and differential has been installed in a fixture, and includes the rear springs and brakes. The K-member and axle are spaced apart on the line fixtures exactly as on the underbody of our SuperBird. Now the engine-transmission unit is lowered onto the K-member, the propeller shaft is installed, and this completed drivetrain disappears from view, proceeding under the plant floor.
All the while the engine and chassis are being built-up, the body shell is being built-up on the Trim Line. Workers on wheeled stools do underbody work first, installing the gas tank, fuel lines, and brake lines. Undercoating is then applied.
Shortly after this work is completed, the body lowers toward the floor and the Chassis Line rises from under the floor to meet it. The chassis assembly is installed together, upward into the car body. Attaching the entire K-member assembly is accomplished by installation of the large frame bolts. The upper A-arms are installed into their body receptacles, the transmission crossmember is bolted in, the rear spring ends are attached, and all lines and linkages are connected. The correct torsion bars are selected from crates containing five hundred bars each, as received from their manufacturing plant. This unibody chassis mating method is very similar to the old body-drop used with body and full-frame construction.
There is another area of the Chassis Line whose work is now installed on the car, the Tire and Wheel section. This area is elevated above the main floor of the plant. It also has a broadcast teletype printer. Responsibilities here include providing the Trim Line with mounted, matching, correct sets of tires, with the correct style of wheels. Tires are mounted on wheels with an automatic, high speed machine. It blows the correct amount of air into the tire very quickly between the bead and rim just before mounting is complete. Balancing follows.
Ready sets of four tires, plus the correct spare, are dropped down metal tubes to each side of the Trim Line installation point. Assembly line boredom combined with the desire for efficiency apparently has motivated workers here to learn how to land the spare tire of each and every car with one bounce into the trunk! They will find this trick tougher on the SuperBird; its deck lid opens a limited amount, to prevent it from hitting the fastback panel.
Once all the underneath work is done on the car, it drops onto a “flat top” moving assembly line, which resembles the tracks of a bulldozer. The car now sits on its own mounted wheels and tires, but it is guided along the line by the flat top. The front end is sitting very low because the torsion bars have not yet been adjusted. This allows easier engine compartment access.
Instrument panel sub-assembly is in a remote area of Lynch Road, and requires its own broadcast sheet. Whether a car will have air conditioning makes a big difference to instrument panel parts selection. Nearly each of the car’s electrical options has an instrument panel control or light, all of which must be installed, together with the correct instrument cluster, all of the panel wiring, and the crash pad.
Another sub-assembly area of the plant Bondurites and color-coats the small, Lynch Road-made metal items like the instrument panel frame. This “Small Parts Painting Department” has its own broadcast sheet for parts selection and preparation. After Bonduriting, the small parts are not primered. Rather, they are color-coated electrostatically. An instrument panel frame is connected electrically to one polarity, while the paint gun and its paint is of the opposite polarity. Good paint adhesion results, but more important is the even coverage and paint savings.
Completed instrument panels are sent according to Sequence Number by overhead hooks to their installation point on the Trim Line. Sometimes a highlighted broadcast sheet is taped to the glovebox or is stuffed above it by the Instrument Panel Department workers. These sheets may remain in place on the instrument panel when the car leaves the factory.
On the Trim Line, the heater/air conditioner has already been attached to the dashpanel. All body wiring, lights, and electrical equipment is installed. The radiator, and all the drive line fluids are added from overhead-mounted hoses. By now we have reached the rear of the plant after traveling through the many turns of the Trim Line.
We now have a car that will run and drive. A worker carrying a simple wooden seat (hand-upholstered with scrap foam!) walks to our waiting SuperBird, places the seat on the driver’s side floor, starts the engine, and drives off!
He is not going far, only to another part of the Trim/Chassis Department, called the “Rolls.” Here are floor-mounted rollers onto which the car’s rear wheels are driven. This allows considerable driveline testing, as well as providing a complete electrical check under a variety of running conditions. The object of this testing is to detect any noises, vibrations, leaks, shorts, or outright failures. If such are discovered, repair holes, manned by line workers with seniority, are able to fix any problem from minor to disastrous. Cars are never scrapped as being “unfixable” or “not worth fixing.”
When roller testing and any repairs are completed, the car is driven another short distance in the plant, to the Final Line stage of assembly. This is the longest line of all, being 1980′ in length, extending straight to the front of the plant.
Final Line work concentrates on body trim and the interior. An early task is installation of the headliner. For our sample SuperBird, it is a special-cut piece due to the added rear window area, and it is always black whether the remainder of the interior is black or white. (This is a singular exception to color coordination).
Next installed are the door latches, window seals, window regulators, and the glass. Before any upholstery is installed, every car passes through a water leak test booth, which is the length of three cars. Highly-pressured water is directed at the top, bottom, and sides of the car as it travels through the dark booth. An inspector riding inside the car looks for leaks, using a flashlight, and notes any problems on a heavy paper inspection form.
Charge-up of the air conditioning system is done on the Final Line. Four cars at a time can be charged, which is all automatically done. Each car is hooked to an overhead rail-mounted charging system, which is pulled along by the car itself as it travels down the line.
Upholstery panels for the doors and quarters, and the seat fabric and foam, are supplied by a Chrysler subsidiary, or by an outside vendor. Lynch Road assembles to the seat frame and spring assembly the padding and upholstery in a remote sub-assembly area. Here is yet another broadcast sheet printer. Often, this area’s sheet is inserted behind the springs of the rear seat vertical cushion before the group of seats for that car is hooked to the Final Line installation area. The front seat(s) are covered with clear plastic.
Much of the length of Final Line has a center pit for under-car installation and adjustment. A major task is complete alignment of the front steering and suspension. There are many small tasks done on Final Line, such as installation of the air cleaner, window chrome trim, some mouldings-emblems-stripes, and all of the many instructional and legally required small decals, dispensed from overhead rolls. Several owner/operator instruction tags are attached to the driver’s controls. The plastic-wrapped bumper jack is installed in the trunk and cars with standard-type wheels have their hubcaps placed in the trunk. The headlights are aimed with special instruments.
End of the Superbird Assembly Line
When a car reaches the end of the main part of the Final Line, and it requires minor optional items, the car goes onto short “repair” lines running the narrow direction of the plant, crosswise of the Final Line. This is the Car Conditioning Area. Here some of the decorative stripes, and painted-on stripes are applied. Any final repairs are made. A car that has randomly been selected for a full-car inspection may spend time here if anything was found amiss. This inspection will be evidenced by many more inspector’s stamps and markings than found on the usual car, which will have received an inspection only at the end of each department through which it passes.
A very late, final sequencing task is application of the car’s VIN-imprinted Monroney Label to the rear of the driver’s door. As the car goes out the Lynch Road door, the final operation is spray-on protective waxing.
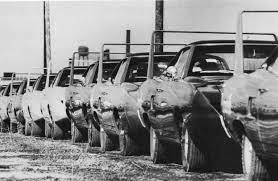
None of the SuperBirds are completed cars, for they are all missing their nose cone assembly and wing. These cars were driven onto semi-trailer car haulers for the five mile trip to the Clairpointe Pre-Production facility. Its purpose needs to be explained before we complete assembly of our car there. Its usual function was a training area for assembly of the next-year’s models. It was complete with scaled down versions of every major area of an assembly plant, so that the new parts and new technologies could be tried under actual conditions before the “real” cars were assembled. (Clairpointe test cars completed are “pilot cars”).
For example, in May of 1969, perhaps twenty of the soon-to-be-introduced E-bodies were completely built at Clairpointe. In late 1969, this facility was not in use because the 1970 models were already in full production (since August 1, 1969), and the 1971 model pilot assembly had not begun. Therefore, it was ideally suited for SuperBird final assembly; its close proximity to Lynch Road was an added bonus.
When was the first Plymouth Superbird built?
There actually was little assembly required when the cars arrived in no particular order from Lynch Road. The first car to arrive was RM23?0A149789, on October 17, 1969. It was completed and shipped out the same day. The last car to arrive was RM23U0A172609, which arrived on December 17, 1969, and was completed the next day. (SuperBird VINs themselves range from 149597 to 181274). Several cars were returned to Lynch Road for repairs, which must have meant major parts were wrong, such as a 1970 Road Runner front end mistakenly attached, or the car was seriously damaged in transit. Clairpointe normally could repair normal parts malfunctions itself.
Nose cones were received from Creative Industries fully assembled. All internal nose parts (except hardware) and the interior surfaces of the shell itself had been individually sprayed flat black over bare metal before any assembly. The outer surface of the nose shell was painted with light grey primer, before assembly of internal parts.
Almost all internal structural parts of SuperBird noses were borrowed from the Charger Daytona nose. Despite countless press articles about these cars, the only fiberglass parts of the nose cones were the headlight doors, which do interchange between Dodge and Plymouth. Both cars used the complete 1968-69 Charger vacuum headlight system. SuperBirds used nose parking lamps from the 1970 Fury (clear lens version). Both winged cars used the same small nose cone spoiler, the exact design of which merited more time than any other special part, due to cooling worries. The SuperBird’s inward tilted wing uprights result in superior air flow compared to the Daytona’s straight uprights. However, the SuperBird’s compromised rear window area resulted in an overall slower car.
The primary Clairpointe concern with the nose cones was correct operation of the headlight doors, and proper parking lamp mounting. Precise federal safety rules had to be strictly followed after approval for these designs had been obtained.
Wings and noses were painted in lacquer before installation on the car. The Clairpointe baking oven could not be used to bake enamel paint because the nose cones had to be fully assembled before color-coating. Sometimes the lacquer-colored nose and wing did not precisely match the enamel-colored body of the car! The nose spoiler was painted body color while off the nose.
All of the decorative decals on the car were installed at Clairpointe. The assembly guidebook prescribes these combinations concerning the wing decals and the “Plymouth” quarter panel lettering:
White decals: EB5-EV2-999
Black decals: EW1-EK2-FY1-FJ5
The nose decals were always matt black, using DiNoc material (slightly textured). Only the left headlight door received a miniature version of a wing decal.
The final items installed on the SuperBird were the trunk-mounted front frame rail jack and handle, special jack instruction decal under the deck lid, the loose-shipped nose spoiler, license plate bracket, and the cardboard template to mount it. For those states requiring front plates, it was to be mounted on top of the nose shell, between the headlight doors!
Perhaps a postscript is justified here. While about one-half of the approximately two-thousand SuperBirds found immediate buyers, many of the remainder were almost unsellable. It was possible to buy a dealer-new SuperBird in some locations two or more years after their production. Many were converted into Road Runners by weary dealers. Some of this sad problem was undoubtedly due to the limited demand for so impractical a car. But in large part it was due to insurance rates so expensive that some companies instructed their agents to “write for a quotation.”
Selling SuperBirds proved to be of little difficulty for performance-wise dealers, however. First Avenue Plymouth, of Cedar Rapids, Iowa, sold fifteen, more than any other dealer.
BROADCAST SHEET NOTE: In our tour of Lynch Road, we encountered broadcast sheets from at least every major area of production. There was no legal reason to include with the completed car any of the sheets. In fact, in later years they were actively eliminated because the paper was not in compliance with government standards of cloth fire resistance.
LYNCH ROAD TODAY: By leveling the Hamtramck Plant, then leaving Lynch Road, Chrysler ceased to build cars in Detroit itself. City government pressured Chrysler to sell Lynch Road to the city for one dollar in about 1984, as compensation for large employee layoffs. Today, the plant still stands, and is used by several small businesses and city government for storage and light manufacturing.
RESEARCH ASSISTANCE: Galen Govier, Nigel Mills, and Jim Radke provided valuable knowledge based on their many years of Chrysler product research.
This article was originally found here.
What about the last Plymouth Superbird?
To read about the final Plymouth Superbird, click here!